Monday, May 5, 2008

Light Ale - Brewing and Bottling

I brewed the Light Ale kit from www.morebeer.com last weekend. Brewing went just fine, it was something like 6 lbs. of ultralight liquid malt extract, and about a half a pound of Crystal 40L as adjunct grains. Only 0.5 oz. of Glacier (6% AA) hops were used for the boil and 1 oz. of Glacier (4.6% AA) were used for aroma so it shouldn't be very hoppy. (Indeed, it isn't, as I'll mention in the bottling part of this post.) I used Nottingham Ale dry yeast as I needed this to brew in about a week.

I then bottled it this weekend, however, I had a bit of a devilish idea as you can see below.


That's right, there's a serrano pepper in that beer. There's 13 more just like it. It's going to be quite the beer as the peppers are pretty darn hot. I steamed the peppers very briefly to try to help sanitize them and just that little time in the steam they already began to exude an intense aroma of capsaicin. I was wearing gloves the whole time while handling them (I'm not afraid of peppers, it's just part of my sanitation procedure) and figured I didn't get any residue on my hands. Well, I must have touched some residue and scratched my face at some point b/c the whole left of my face is burning a little right now.

Anyhoo, peppers aside, the beer tastes just fine (as well as a beer fresh out of the fermenter can taste) and weighs in at about 4.5% ABV. I'm really looking forward to cracking open one of those pepper beers. How apropo that I bottled this on cinco de mayo. I should call it Ale Caramba, or maybe Cinco de Mayi-yi-yi-o, I don't know.

Scotch Ale - Bottling and Tasting

It seems that I was not vigilant enough with my cooling and at some point the beer got warm enough to start producing fruity esters. It smells rather like banana, however, this is not reflected in the taste. I bottled it last weekend and so cracked open a bottle yesterday just to see how it was doing. Let's just say it needs to age for several more weeks. I don't think I'm going to try it again for another 3 weeks. Right now it's not looking so hot, but aging can do wonders for a beer, so we'll see.

Monday, April 21, 2008

Scotch Ale - More Good News

The addition of the Nottingham Ale yeast seems to have done the trick. The beer has cleared up immensely and fermentation has finally begun to slow. That means I should be able to bottle this weekend and consequently, brew the Light this weekend as well. So it looks like it's going to be a very beery, busy weekend for me.

Saturday, April 19, 2008

Scotch Ale - Bad and Good News

Ok, first the bad news.

I'm an idiot. It didn't strike me that I might have a stuck fermentation until this morning. I guess I didn't think of it because it was still bubbling and normally stuck fermentations seem to stop altogether. However, the SG reading I took (1.032) confirms the stuck fermentation. I really should have seen this coming because I've been keeping the carboy at pretty low temps and this beer had a pretty high OG.

I doubt this will have any major effect on the beer. It tasted fine when I pulled the sample (as fine as a half-fermented beer can taste). If I've learned one thing about home brewing it's that it's pretty idiot-tolerant. I think that's why it's such a great hobby. The learning curve is such that any shmuck can start homebrewing and make a pretty decent beer even his first time. He can make tons of mistakes and still make a good beer.

Anyhoo, I digress.

The other bad news is that this throws off my brew schedule. Assuming I'm able to bottle next weekend it will only have been in the bottle two weeks come graduation and won't be optimal or maybe even drinkable (it really should age 4-6 weeks). Also, I'll have to push back when I brew the Light, although that should still be drinkable by graduation as it really only needs about a week to brew and a week in the bottle to carbonate. There's still a slight chance it might not be ready though.

So the good news is that I pitched some dry Nottingham Ale yeast and that should get things going again. If you'll remember, Nottingham is a relatively fast fermenter so odds that I can bottle next weekend are good. The other good news is that now I will be more cognizant of a stuck fermentation when brewing high gravity beers at low temperatures.

I'll post again when the Nottingham starts kicking in, so stay tuned.

Monday, April 14, 2008

Scotch Ale - Still Going, and Going, and Going...

I wasn't able to bottle the Scotch Ale this weekend like I had planned. The darn thing is still fermenting. Mind you, it's slowed down some, but it's been going pretty steadily for the past two weeks. I still have yet to put on the airlock, partly because I'm lazy and partly because it wasn't until very recently that I could tell the krausen had subsided. The blowoff tube is still attached, of course, and it's bubbling out about every 7 seconds or so. Hopefully it will stop some time this week so I can bottle next weekend. It looks like I might be bottling on Saturday and then brewing the Light Ale on Sunday.

Here's why I think this batch is taking so long to ferment. Primarily, the fact that the OG was 1.092. There's a lot of fermentables in there and the yeast need time to chew them all up. I should mention that I calculated what my OG should be based on the given ingredients and it was closer to my actual reading than to what the recipe said it should be. I'm not really sure if I should feel reassured by that or not.

Second, my cooling method works quite well and the carboy is kept down around 61-64F. I think this might slow down the yeast a little bit, but it's better than having fruity esters in the beer.

Anyway, that's what's going on. I'm waiting to take a SG reading until the primary fermentation has completed, but I'm guessing it's going to be around 1.020 so this beer is probably going to end up having an 8-9% ABV. I'm thinking it's going to end up being a Strong Scotch Ale. I'll update again when I finally do take that reading.

Monday, March 31, 2008

Scotch Ale - Initial Activity

I noticed the first signs of fermentation yesterday morning and since then it's been happily bubbling away.


You can see that I sort of have a towel wrapped around the fermenter. This is because my closet ambient temperature is now about 68F so I am using a gallon jug of ice to try to keep the fermenter around 60-66F. If it gets much higher then the yeast start producing fruity esters, which aren't really desireable in a Scotch Ale.

Saturday, March 29, 2008

Scotch Ale - Brew Day

Today I brewed the Scotch Ale kit I got from www.morebeer.com. So without further ado, here's how it went down:


Starting from the top right and going clockwise we have 2 lbs. light dry malt extract, a Whirfloc tablet, about 1.5 lbs. of steeping grains, which is a blend of some lighter and darker grains, and finally 1 oz. of Glacier hops (6.0% AA, for boiling).


Here we have 9 lbs. of ultralight liquid malt extract, and some liquid, pitchable yeast of the Edinburgh strain.


I was brewing alone today, so I came up with a nifty method of putting the steeping grains into the grain bags. I use a bowl to keep the bag open while I dump grains in. Works pretty well.

I steeped the grains for 30 minutes at about 160F in 2 gallons of water before adding the malt, which is shown in the next picture.


Here I have already added the dry malt extract and am currently adding the liquid malt extract.


Here I am bringing it up to a boil. You can see that the dry malt extract has created this thick, creamy, foamy head. I've never used dry malt extract before so I've never seen this before.


Here's the wort just after I've added the hops (and lifted the pot up to keep it from boiling over).

The hops were boiled for 60 minutes, with the Whirfloc tablet added to the last 20 minutes of the boil. The Whirfloc is a fining agent that flocculates the proteins that cause haze. I've never really had a problem with haze in my other beers when I haven't used it, but I figured I'd give it a shot anyway and see what happens.


Next I cooled the wort then added it to the carboy and topped it off at 5 gallons with more water. Here I'm waiting for the temperature to stabilize so that I can pitch the yeast.

I had a better time with opening the liquid yeast vial this time. It was only out of the fridge for about 3 hours and did not explode when I opened it.


Here it is in my closet, blowoff tube attached, ready to start fermenting.

Since it's getting warmer and my closet is south-facing, I'll probably have to employ some sort of cooling method to keep the carboy between 60-66F. Maybe just putting some frozen water bottles in close proximity to it will do the trick.

The expected OG for this beer is 1.070 to 1.075, but mine read 1.092. So either it's off because of all the trub suspended in the beer or it's going to end up being a pretty strong Scotch Ale. Time will tell.

I also calculated the bitterness for this beer and it's going to be about 21 IBU, which is a little less than the style definition of a Scotch Ale, so it should be nice and malty.

Anyway, that's all for now, I'll update again once fermentation gets going.

Wednesday, March 19, 2008

Armenian Imperial Stout and Oatmeal Coffee Stout - Tasting

So it's been over 4 weeks since I bottled the Imperial Stout and to celebrate I cracked a bottle open. Oh man. So good. The hops have really mellowed and that roasty/toasty flavor from the grains comes through nicely. It's so good at this point that I'm having a hard time imagining how it could get any better.

As for the Oatmeal Coffee Stout, it's been in the bottle for just over a week, so it's carbonated but barely aged at all. I gave that a try as well and it's still pretty raw (hops are very strong), but I am happy to report that you can definitely taste the coffee. Assuming this ages as well as the Imperial Stout, I'm going to have one very tasty beer in another 3 weeks or so.

My next two beers will be a Scotch Ale and a Light Ale, both kits ordered from www.morebeer.com.

Wednesday, March 12, 2008

Oatmeal Coffee Stout - Bottling

I bottled the Oatmeal Coffee Stout on Sunday. The FG was 1.020 and with an OG of 1.056 that gives an ABV of 4.73%. The bottling went smoothly and I ended up with 46 12 oz. bottles.

As far as taste is concerned, it had mellowed somewhat just since I had last tasted it, but it's still more bitter than it should be. I could not detect any coffee flavor so I added another quart of coffee to the bottling bucket. It's going to have to age for several weeks before it hits my desired flavor profile and it may not even get there. Clearly I miscalculated my hops utilization, I'll have to go back and see what it is that I didn't account for so that I don't make this mistake again.

While amassing the empty bottles for this batch, I realized just how much beer I have now--a lot. I've got 12 bottles each of the Dark Ale and Imperial Stout stashed away for graduation, so that's 24. I still have another 12 bottles of the Dark Ale and 19 bottles of the Imperial Stout for my own consumption so that's 45. Add in what I just bottled and you've got 91 bottles of beer. I've got two more batches planned before graduation, so that's going to be roughly 180 bottles of beer when all said and done. I hope people are ready to drink some beer at my graduation.

Thursday, March 6, 2008

Oatmeal Coffee Stout - First Taste

Well, I took a SG reading this morning and it came out at 1.020, which, with an OG of 1.056, indicates an ABV of 4.73%. I plan on bottling on Sunday, assuming the SG hasn't changed much, which I doubt it will.

Right now the beer is more bitter than I was expecting. I know I used 2 oz. of relatively high alpha acid hops, but with my boiling volume (1.5 gal) I calculated the bitterness to be about 27 IBU, which is right in the mid-range of what an oatmeal stout should be. Perhaps I needed to account for the volume of the liquid malt extracts as well? I'm a little disappointed as it pretty much tastes like the imperial stout with the alcohol and bitterness cut in half (although I shouldn't be surprised as the recipes are quite similar). There are some malty/toasty undertones, but they are very subtle. I'm really hoping it mellows out after a few weeks in the bottle. Don't get me wrong here, it's not a bad beer, I'll definitely drink it, I was just hoping for something a little different.

Also, I don't get much coffee flavor at all, so I will be dumping some additional coffee into the bottling bucket to try to boost that flavor.

Monday, February 25, 2008

Oatmeal Coffe Stout - Brew Day

So this weekend my folks came to visit and I decided it would be fun to brew with my dad. So without further ado, here's the recipe:

Ingredients:


- 7 lbs. of Dark Liquid Malt Extract (unhopped)
- 0.5 lbs. of Black Patent Malt
- 0.5 lbs. of Roasted Barley (unmalted)
- 1.0 lbs. of Flaked Oats (toasted by yours truly)
- 1.0 qt of strong coffee (10 Tbsp. Italian roast, pressed)
- 2.0 oz. of Columbus hops (boiling, 12.2% AA)
- 0.5 oz. of Fuggles hops (aroma, 4.2% AA)
- Whitelabs Irish Ale Yeast (WLP004, liquid, pitchable)

Sadly, there are very few pictures from this brew day. It's easy to get busy/distracted and forget to take pictures. Anyway, here's the procedure:

I toasted the oatmeal in my oven for about 40 minutes at 350F. Unfortunately I only have one oven rack so I wasn't able to toast them as efficiently as I would have liked, but I think they got toasty enough.

The grains and oats were steeped in 1.5 gallons of water at 150F for 45 minutes and the malt extract and hops boiled for an hour. The aroma hops were added for the last minute of the boil.

The cooled wort was then added to 1.5 gallons of water plus the cooled coffee in the fermenter. This time I used a colander to filter out some of the trub, which made adding the wort go a lot faster. Of course, not all of the trub gets filtered out, but that's not such a bad thing as the yeast like to munch on it during the lag phase. The fermenter was then topped off at 5 gallons with more water.

The recored OG was 1.056, right at the top end of the range for this style of beer. The ABV should come out somewhere around 5%, the bitterness around 27 IBU, and the color, well, dark (~48 SRM, for you numbers people).

I had removed the liquid yeast from the fridge about 6 hours prior to pitching time, which in retrospect was more than enough time for it to come to room temperature. When I cracked the seal on the vial it behaved similar to a soda can that had just spent a few minutes in a paint can shaker. I probably lost roughly 25% of my yeast because of that. Always the (naive) optimist, I pitched the remaining yeast and hoped for the best.

This was my first experience with liquid yeast. I've been using dry yeast and the lag times are usually around 8 hours. Thus, I began to grow concerned the next morning when the yeast had still not started to ferment. I tried to bring the temperature up around 70F and I agitated the carboy a bit to try to get the yeast back into suspension. I'm not sure if it was anything I did or not, but the yeast finally started fermenting about 24 hours after pitching, much to my relief.


Apparently, liquid yeast, especially those that have been in their packaging for roughly 2 months like mine, have lag times around 15-20 hours, so what I experienced isn't too surprising. I just need to learn to relax a bit more.

I plan on bottling this batch in a couple of weeks. I'm thinking that if the coffee flavor isn't as strong as I'd like I might add some more coffee to the bottling bucket.

Sunday, February 17, 2008

Armenian Imperial Stout - Bottling

Bottling went smoother this time, mostly because of lessons learned from the last bottling. It still took me about 3 hours from start to final clean-up because you still have to sanitize, fill, and cap 48 bottles.

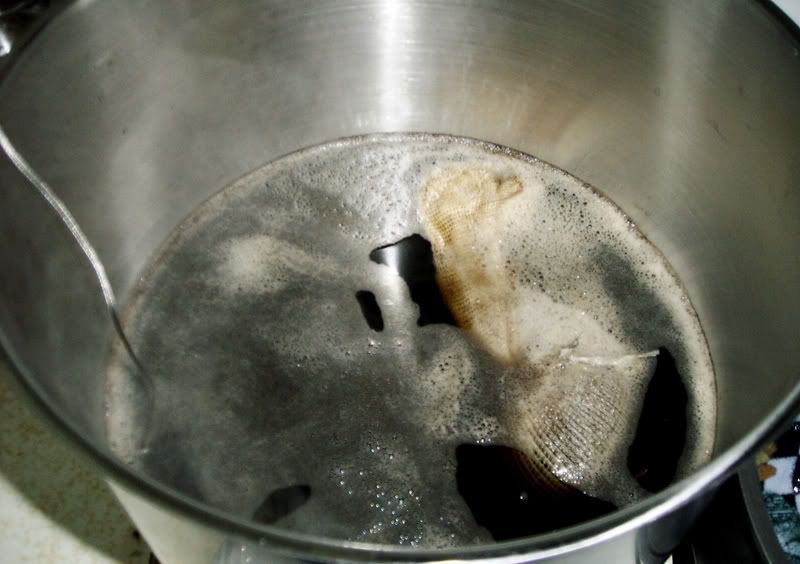
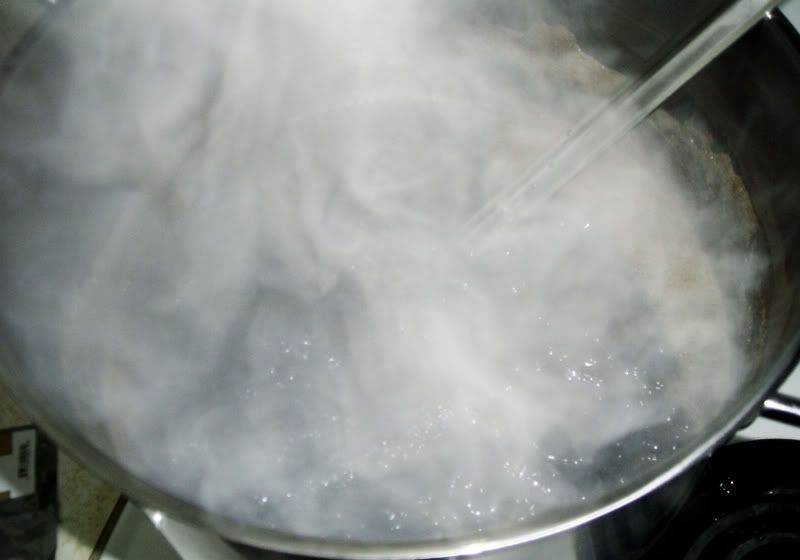
Boiling the priming sugar before I did anything else was the way to go because by the time I was ready to pour it into the bottling bucket it was down to near room temp. The acquisition of hose clamps also improved things as it made my auto-siphon actually work!

Anyway, here's the rundown. (I apologize in advance for the poor picture quality. Not only am I using a crappy camera, but I think I have Parkinson's or something becuase I could not keep my hands still.)


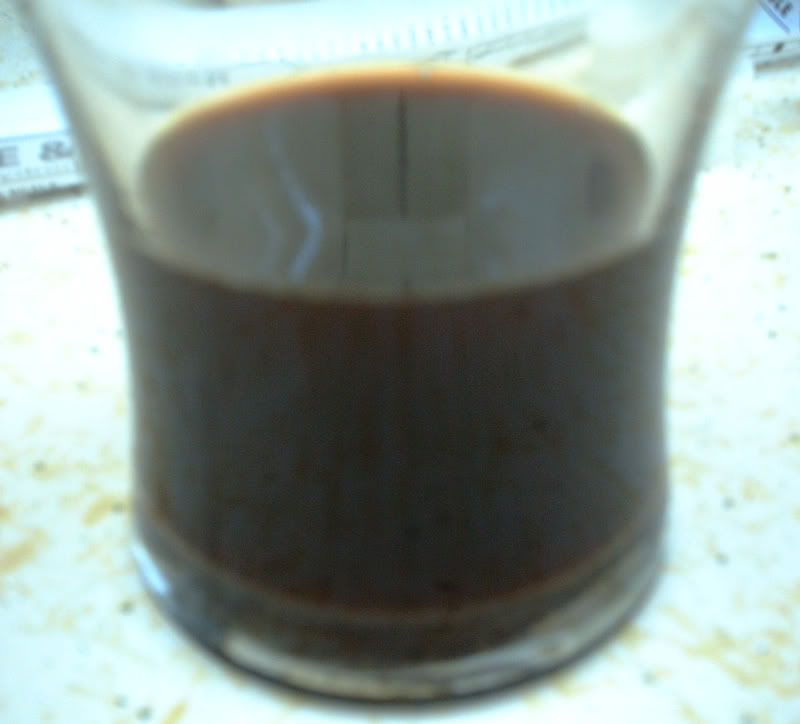
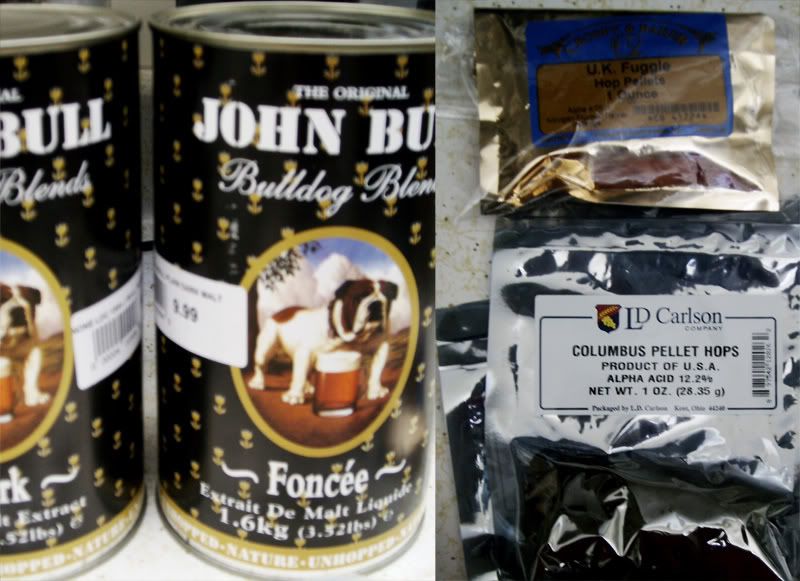
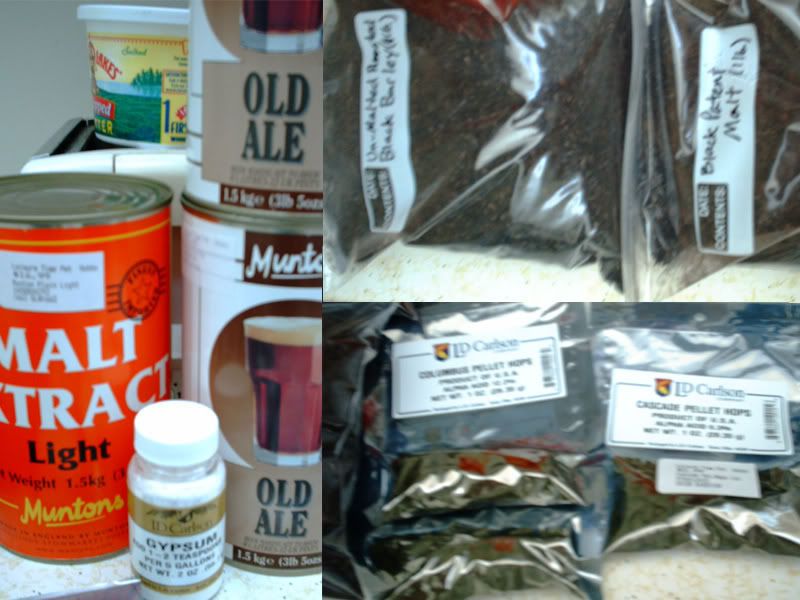
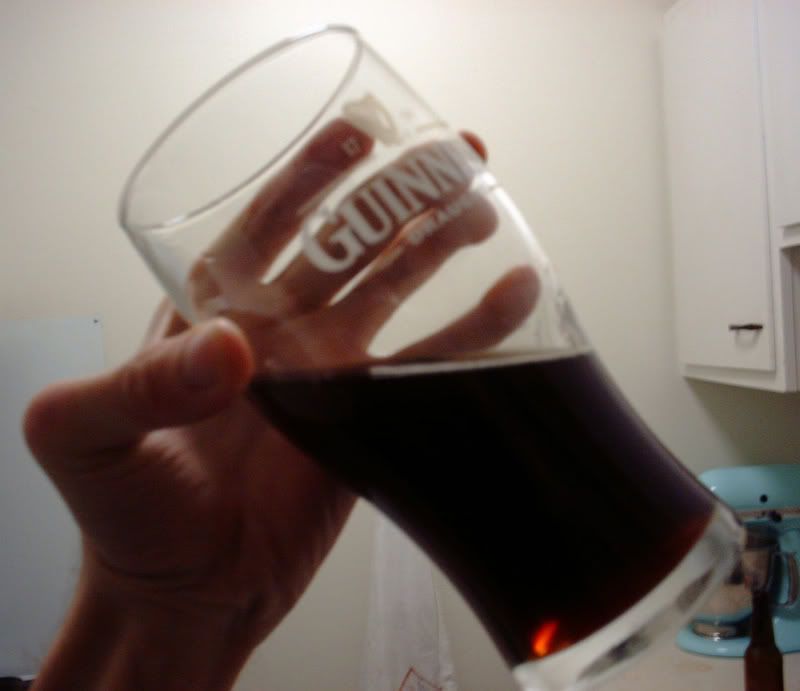
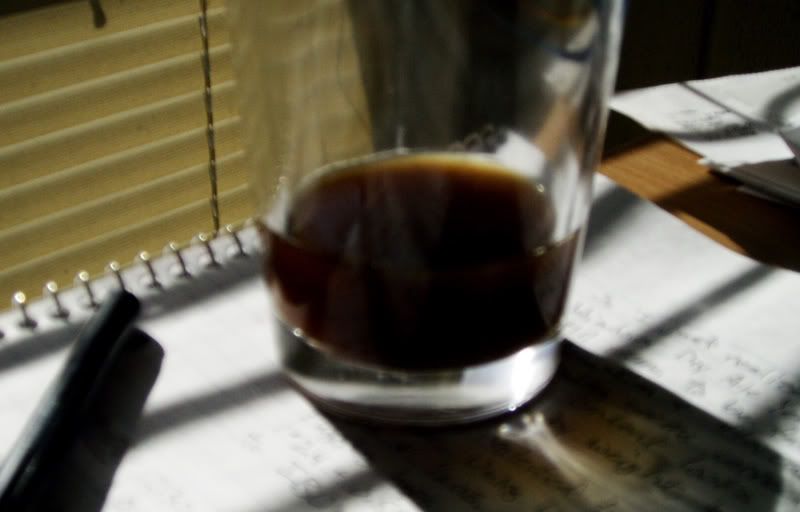
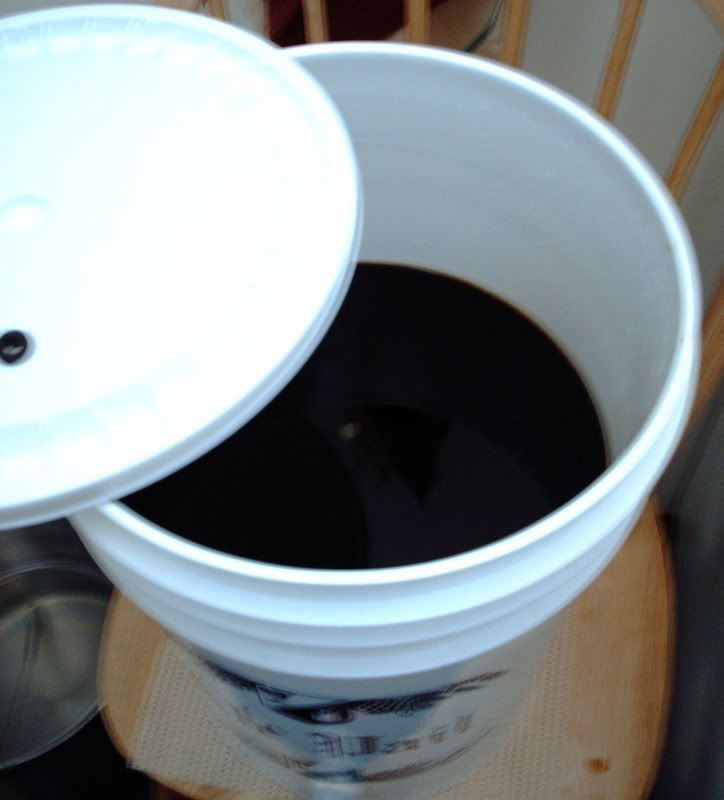
As you can see, it's a very dark beer. As I mentioned before, the recipe is from 
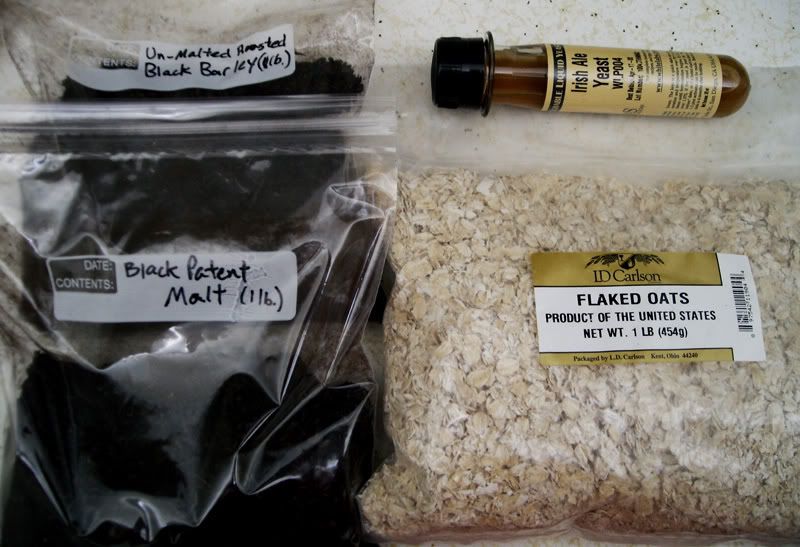
Charlie's book and as far as I can tell, everything he says about this beer is true. My OG and FG were both a little higher than the recipe states (1.082 and 1.026, respectively, versus 1.075 and 1.025, respectively). Normally, his book has an expected bitterness (in IBUs) and color (in SRMs) for a given recipe, however; for this beer he states that the bitterness is "Like wow!" and the color is "Like really dark".

He couldn't be more correct. I may have understated the bitterness of this beer in my previous post. It is not for the faint of tongue. Most of the bitterness comes from the hops, but despite this, it doesn't come off like a dark IPA or anything. The bitterness really hits you on the aftertaste on the back of the tongue. There is a quality to the bitterness that isn't hop-like, which I think might be from the adjunct grains; it's hard to describe exactly.

Make no mistake though, this is certainly an imperial stout, albeit a bit more bitter than what is available commercially. It has an ABV of 7.35%, which you can't really distinguish becuase of all the other flavors that are going on in the beer. The mouthfeel is medium to full bodied (with an FG of 1.026, how could it not be?), but isn't syrupy at all. (I hate syrupy beers.)

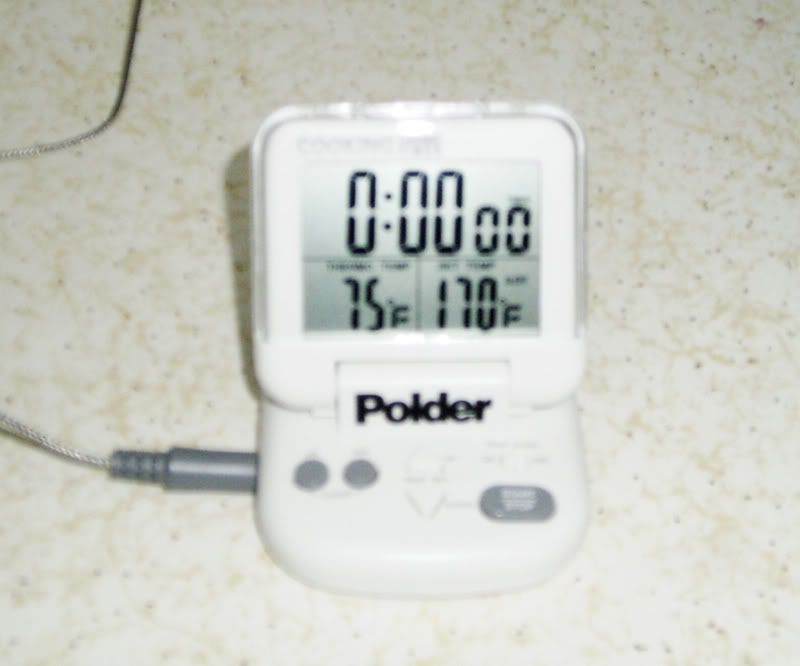
Another thing I should mention is that the beer smells a little fruity, although there is no fruity flavor whatsoever. I'm wondering if maybe sometime in the past couple of days the temperature in the fermentor got a little high and the yeast produced some esters. I don't remember that aroma being there a few days ago when I last pulled a sample. I might be overreacting though as it's kind of hard to tell if it's truly fruity or if the aroma is just from the alcohol as the aroma of alcohol has a significant presence as well.

I believe all the harshness of this beer should mellow out with age, and if not, hell, I'll still drink it. Apparently the beer is ok to drink after two weeks, but really starts to be optimal after four to six weeks. You can also age it for longer than that and it supposedly continues to improve, so I'll have to let some of them age for a few months to a year and see what happens.

Ok, on to the bottling process.


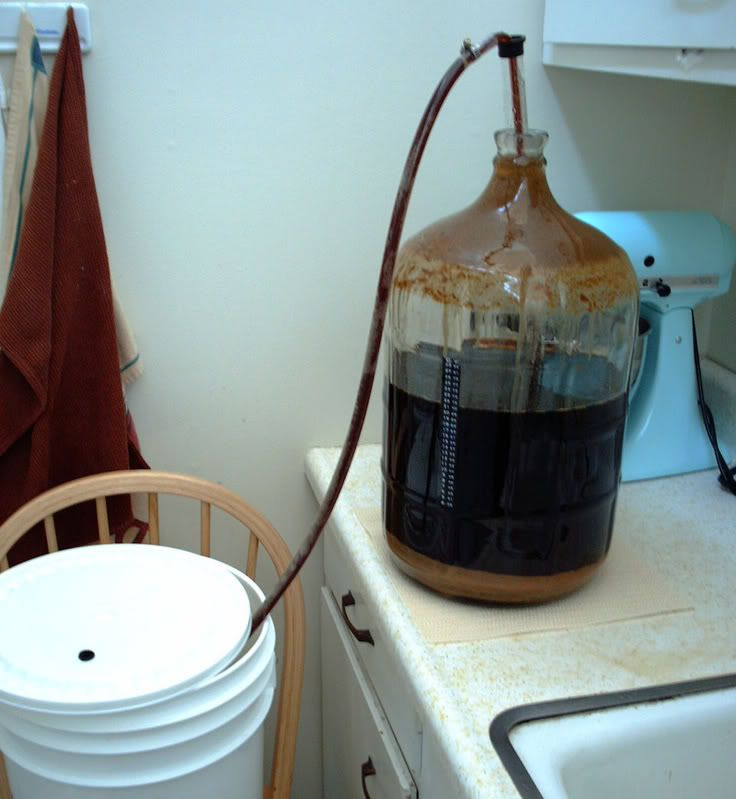
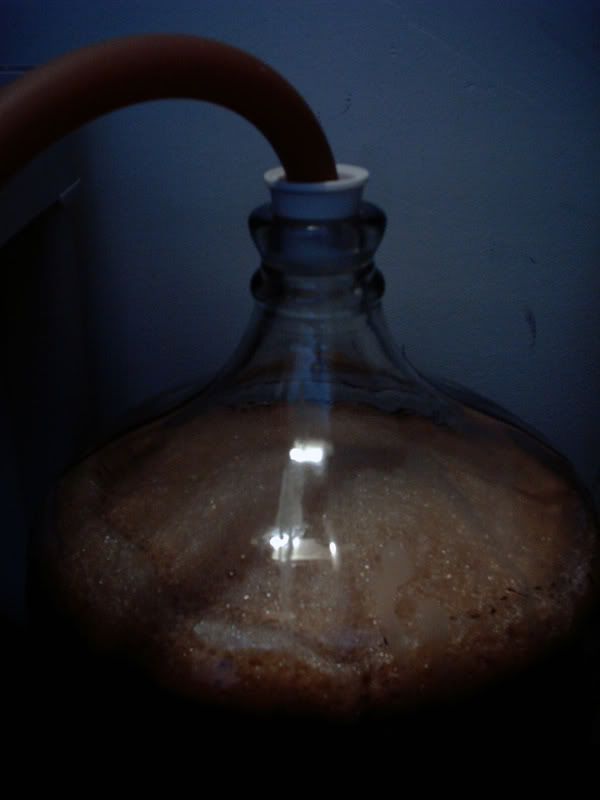
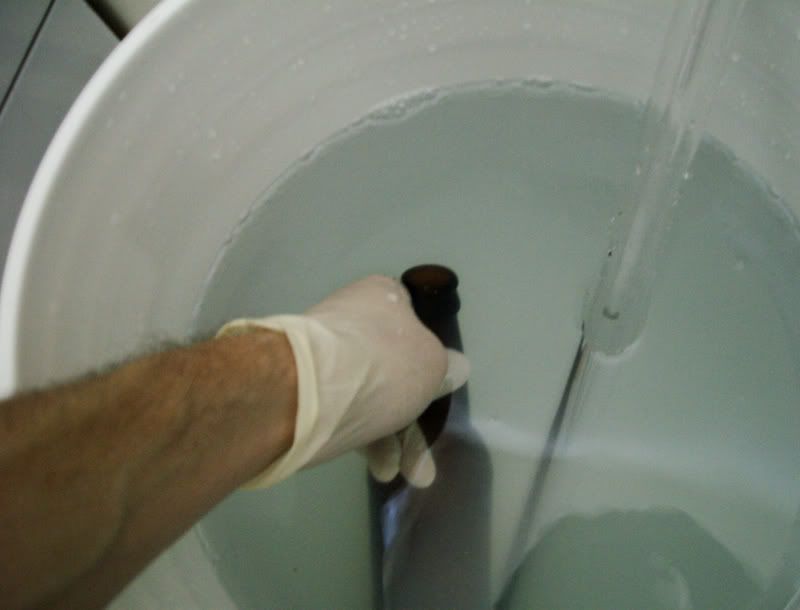
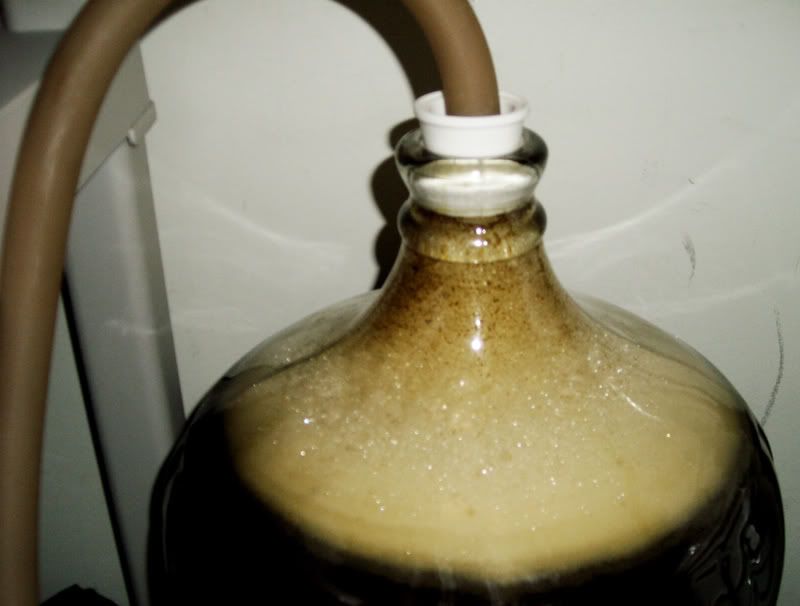
Here I'm siphoning the beer out of the fermenter into the bottling bucket which has been primed with the boiled corn sugar. Thanks to a hose clamp, I didn't introduce a bunch of air into my beer this time.


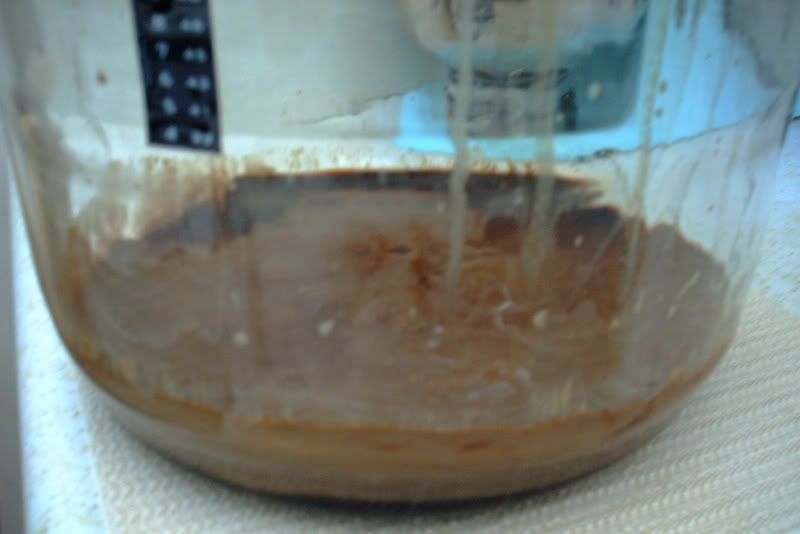
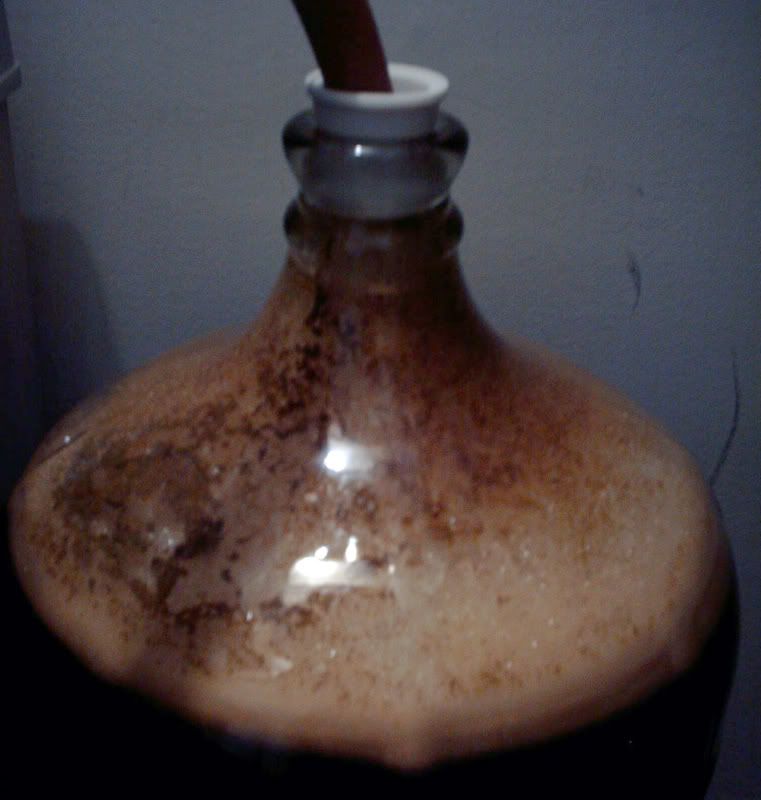
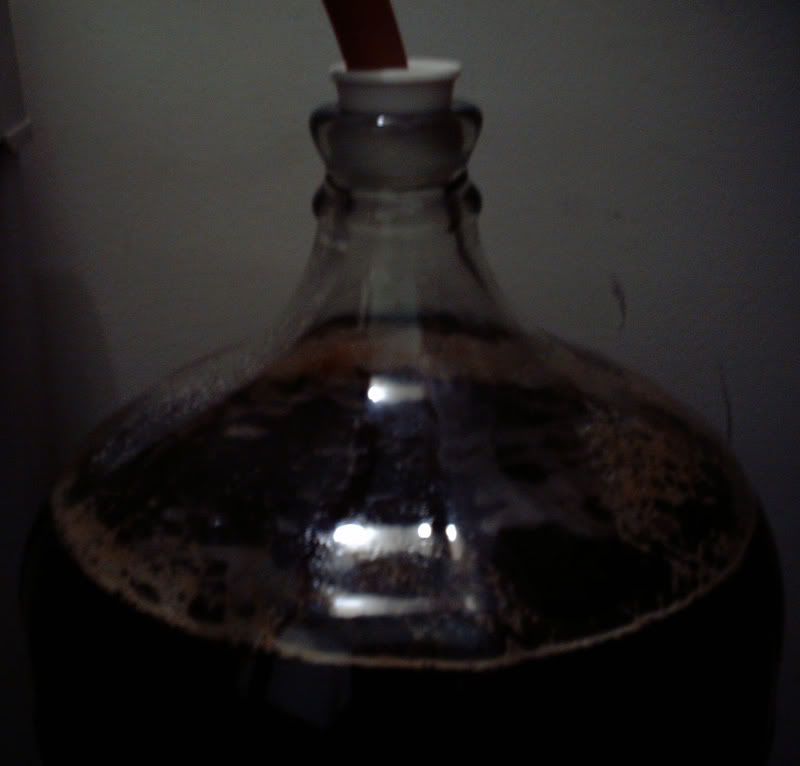
Big fat yeast cake. It's amazing how much the yeast of multiplied from those two little packets I pitched. It's also a little gross, especially when cleanup time comes.

I should mention that I know a guy who homebrews who brews three different batches on the same yeast cake. That means that after he kegs a batch he goes ahead and brews another one and pours the wort right into the fermenter that still has the yeast cake from the batch that he just kegged. I assume he does something to try to remove as much of the beer from the previous batch as he can and also carefully controls his wort addition/temp to keep from shocking the yeast.

It's an interesting method which might be worth trying, but there's no way I'm up to bottling and brewing on the same day. I guess you could maybe have a feeder wort that would keep the yeast alive for a day or two until you were ready to brew again. Hmmm... Anyway.


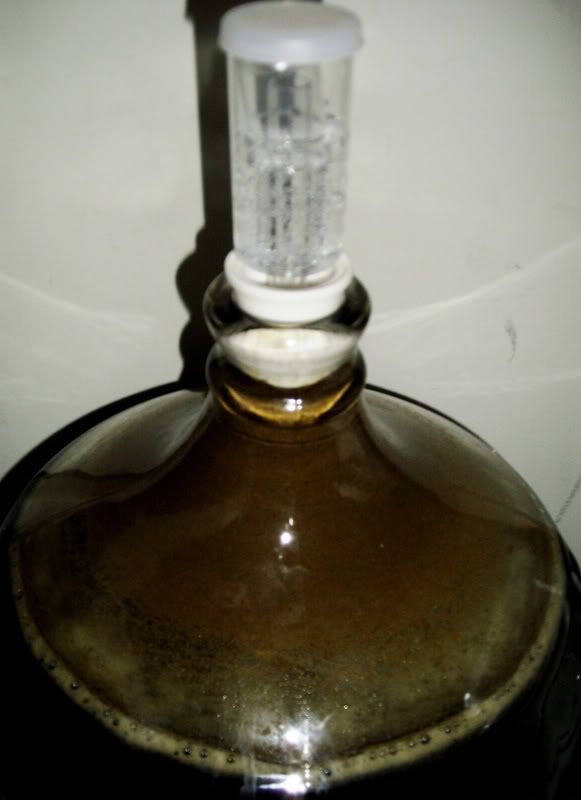
There's 4.5 gallons of home-grown, ready to be bottled, Imperial Stout. Woohee!


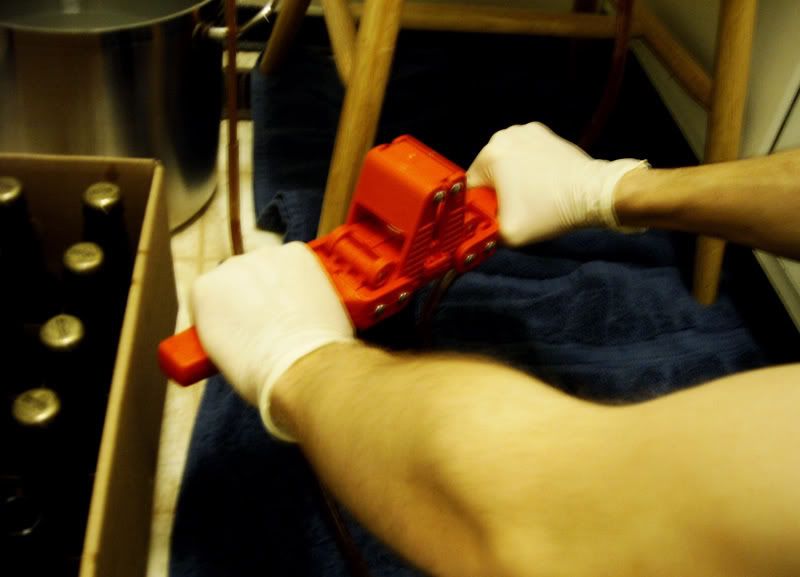
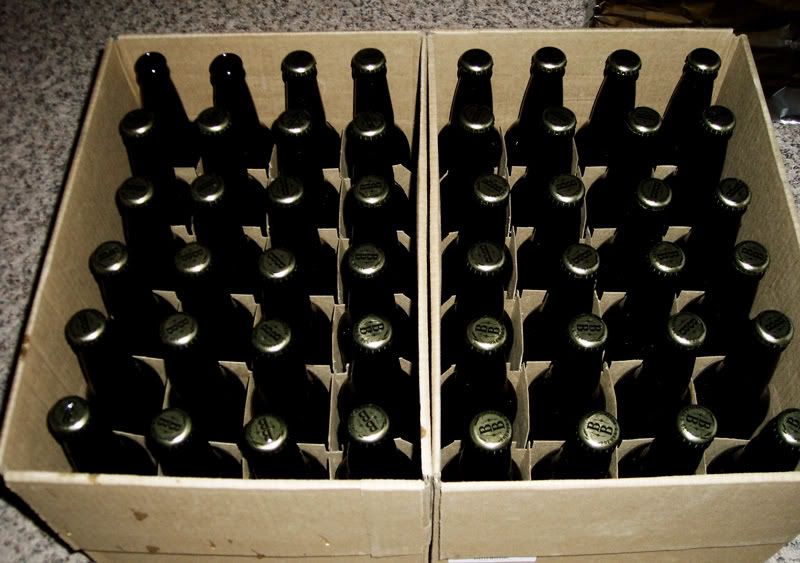
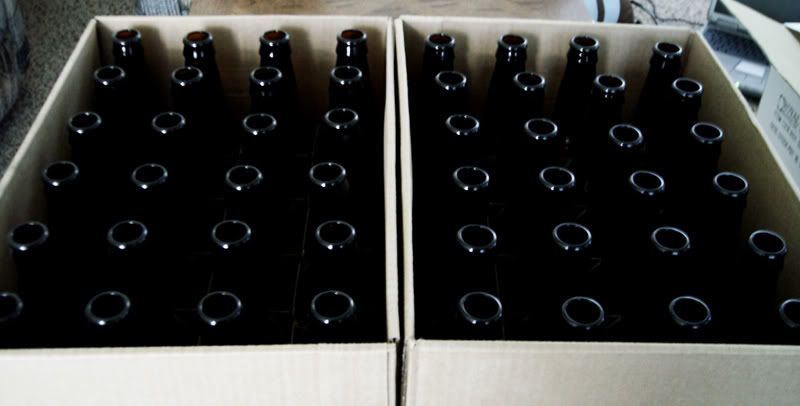
44 bottles filled, capped, and ready to age. (It looks like 45, but the loner on the top left is only about 1/3 full, so it doesn't count.)

Well, not much more to say about this batch. Expect another post in a couple weeks when I taste this beer and/or brew my Oatmeal Coffee Stout.

Wednesday, February 13, 2008

Armenian Imperial Stout - First Taste

The bubbling has slowed to about once every 1 minute, 45 seconds and I want to bottle on Saturday so I thought I would take a sample to see what the SG is like. It's currently 1.026, which indicates an ABV of about 7.35%. Here's the kicker though: there is so much flavor (mostly bitter, but not all hoppy) you can't really detect the alcohol. It is most definitely an imperial stout. Dark as hell, bitter as hell (the good kind, and I expect it to mellow a bit with age), and tasty as hell. I cannot wait to get this batch bottled and aged so I can drink it!

Friday, February 8, 2008

Oatmeal Coffee Stout - Recipe Idea

As many of you are aware, I loves me some coffee and I loves me some oatmeal stout. Thus, it is only natural that I would want to make an oatmeal coffee stout. I've looked around and found a few recipes, but I've decided to try to devise my own. Here's what I'm thinking:

Ingredients:
- 6.6 lbs. dark liquid malt extract
- 0.5 lbs. black patent malt
- 0.5 lbs. roasted barley
- 1 lbs. flaked oats
- 1 qt. strong coffee, freshly brewed (8 tbsp of fresh grounds, Italian/dark roast)
- 2 oz. of Galena hops for boiling (or similar, 13% alpha acid)
- 0.5 oz. of U.K. Fuggles hops for aroma
- Irish Ale liquid yeast (preferrably WhiteLabs, Nottingham Ale dry as backup)

Procedure:
I'm thinking I will roast the oats first, to get a nice roasty/toasty flavor. This will be done in the oven at 350F for about 30 min., moving the oats around every 5 minutes or so to keep them from burning.
Steep the grains and oats in 2 gallons of water at 150F for 45-60 min. Remove, then add extract and boiling hops and boil for 60 min. Add aroma hops for the last couple minutes of the boil. Add cooled wort and cooled coffee to fermenter containing 2 gallons of cold water and top off with more water to make 5 gallons. Pitch yeast when temperature is appropriate. Bottle once fermentation is complete (1-2 weeks).

I used this handy-dandy calculator to figure out what to expect from this recipe, and to make sure it falls within the definition of an Oatmeal Stout. I had to adjust the hops a little, but other than that, the recipe was spot on. Go me!

Here's what to expect from this recipe. Unfortunately the link above isn't quite robust enough to include coffee added to the fermenter, so I've put (estimated) adjusted values in parentheses next to the calculated values.

OG: 1.054 (1.056)
FG: 1.015
ABV: 5.0% (5.3%)
Color: ~48 SRM (50 SRM)
Bitterness: 29 IBU (33 IBU)

I did way too much research on the different kinds of oats available for this. Most brew shops sell "flaked oats" which I've found is basically the equivalent of Quaker "Old Fashioned" Oats. They have been processed to a point where they have already been gelatinized and don't require boiling like other less-processed forms (groats, steel cut, etc.).

My dad brought up a good point about the coffee affecting the pH of the wort, but after doing some calculations I've determined that it's not going to have much of an impact on the pH of the wort.

As for yeast, I want to give liquid yeast a shot, specifically the Irish Ale strain since it's the best for stouts. However, I don't really have the equipment or motivation for doing yeast starters so unless I can get some pitchable liquid yeast I will just use the Nottingham Ale dry yeast.

As for the Armenian Imperial Stout, it's still fermenting. Bubbles are occurring every 30 seconds now and there's a nice malty/hoppy/beery aroma emanating from the fermentation lock, so all is going well.

Update: I fixed some stuff in the recipe, specifically not boiling the coffee with the wort as it will affect the flavor/aroma of the coffee. Also added OG, FG, etc.

Update 2: Updated coffee roast/amount, added comments about pH, added yeast comments.

Wednesday, February 6, 2008

Armenian Imperial Stout - Activity

Just a quick update. The blowoff phase seems to have completed. Even though the krausen is still present and occupies all the head space in the carboy, I have not noticed any further flow out of the blowoff tube. Thus, I have placed the fermentation lock on the carboy and it is merrily bubbling away every 7 seconds or so.

Based on what I've read of this particular strain of yeast (Nottingham), I expected the bulk of fermentation to be done by now as it's supposedly pretty fast. However, there are a lot of fermentables in this batch and because of this I pitched two packages of yeast instead of one, so I think fermentation is going to take somewhat longer. Of course, this isn't a big deal as I was planning on leaving it in the carboy for two weeks regardless.

Sunday, February 3, 2008

Saturday, February 2, 2008

Armenian Imperial Stout - Brew Day

So today I brewed the Armenian Imperial Stout found in Charlie Papazian's book.


Collage of ingredients. Here's the rundown (butter not included):
6.6 lbs. of Muntons Old Ale Kit (that's a hopped extract)
3.3 lbs. of Muntons Light Ale Extract
0.5 lbs. of Black Patent Malt
0.5 lbs. of Roasted Barley (un-malted)
3 tsp. of gypsum (has to do with the water chemistry)
2 oz. of Columbus hops (boiling, 12.5% alpha acid)
1 oz. of Cascade hops (aroma, 6.3% alpha acid)
2 pkg. of Danstar's Nottingham Ale Yeast (dry, not pictured)

The grains steep for 30 min. at 150F-160F, then the extracts, gypsum, and boiling hops get boiled for 60 min. The aroma hops are thrown in for the last minute of the boil.


Here the grains are being steeped while the cans of extract are sitting in simmering water so that they are easier to pour later. I cannot wait to have a decent oven/stove. I would really like a nice big gas range, especially one that has a digital thermometer built into each burner so that you can set the probe in your pot and set the burner to stay at a certain temperature. Trying to keep a pot with 1.5 gallons of water in the 150F-160F range for 30 minutes on a small electric range is frustrating, to say the least. The oven should also have a cylon eye and talk like KITT from Knight Rider. But I digress.

Again, I had issues with separating the hops and break (the proteins that clump together because of the boiling and cooling) from the wort. I used a larger stainless steel strainer which let me work a little faster, but it isn't really an option when brewing by one's self. Luckily, Greg was nice enough to come over again and help me brew so I had an extra pair of hands to hold the strainer and funnel. I think on my next brew I will try the decanting method described here. (It's worth noting that that website, www.howtobrew.com, is an excellent resource for the beginning homebrewer.) He doesn't say what the scrubby pad is for, but I guess it goes on the bottom of the siphon so that the gunk doesn't get up in the siphon and you can just scrape it off the pad.

This beer is said to have an OG of 1.070-1.075. My OG actually measured 1.082 (yowzers!). Assuming it reaches the expected FG of 1.018-1.025, it should have an ABV around 8-9% (wowzers!). I used two packages of the Nottingham yeast because even though that particular strain has a pretty high attenuation, I wanted to make sure I have a large enough yeast population to finish the job.

Not only will this beer be pretty dry, but it's (allegedly) going to be fairly bitter as well. I believe the final bitterness should land somewhere around 100 IBU. I'm calculating something much higher (due to the hopped extract), but I don't think it will get nearly that high. Of course, 100 is the technical limit for IBUs so it doesn't really matter anyway.


(Sorry for the dark picture, I'm using Allison's old camera and I can't seem to get the flash to work.) I plan on letting this beer sit in the carboy for two weeks before bottling even though the bulk of the fermentation should take place over 4 days. I mainly just want to see if letting it condition in the fermentor makes any detectable differences in the beer. (Of course, if I wanted to be really scientific about it I would get another carboy and do two exact brews in parallel, bottle one after the primary fermentation is done and let the other condition in the fermentor for a week or so before bottling. But I don't really feel like doing that.)

Not much activity going on yet, but I will be sure to post again when things start happening.

Friday, February 1, 2008

Badger Dark Ale - One Week Since Bottling


Well, it's been nearly a week since I bottled so I decided to crack one open and try it out.

As I pried off the bottle cap I was greeted with a healthy *hiss*--a sign that bottling had probably gone well. I gently poured it into the glass, maybe too gently as no head formed. The beer seems to have cleared somewhat in the bottle. It's still a dark beer though so it's rather opaque, but you can tell that it isn't cloudy.

It tastes pretty good; it's much better now that it's carbonated. It's more malty than anything though and I can't really detect any hoppiness at all so it's not very bitter. I was expecting a bit more character, but I still think it's pretty good for my first beer. We'll see if things change as it ages. The body is medium; it's not as thin as a Guinness, but not nearly as thick as a proper stout. It also has this kind of sweet aroma when you bring the glass up to drink it, but it doesn't taste too sweet.

I will probably brew my imperial stout tomorrow, so there will probably be a post about that.

I've plotted it out a little and I think I can have 5 different homebrews on hand by the time graduation rolls around, maybe 6. The real limiting factor is space, but I'm sure I'll figure something out. In addition to the dark ale and the imperial stout I want to try a brown (or maybe a scottish) ale, a bitter/esb, and a "lite" beer for those who prefer that sort of thing that will be around during graduation. A straight up stout or porter would be nice though, so I might do that instead of the brown ale. We'll see.

Sunday, January 27, 2008

Badger Dark Ale - Bottling

So I took another SG reading this morning and it was still at 1.016, which means I was ready to bottle.

I would have to say that the flavor has improved, just over the short amount of time since I last tasted. It still has that even balance of maltiness, bitterness, sweetness, hoppiness and alcohol. I think it's actually gotten a little maltier though so it's a little more bitter than it is sweet now, but I like that. Body is medium, which is mostly because of the low attenuation of the yeast. It's still kind of cloudy, but that's more of an aesthetic thing than a flavor thing.

Since the SG didn't change from the last reading, my FG (final gravity) is 1.016 and thus the ABV is 3.15%.


Here's the sample I pulled, you can kind of see how it's a darker beer, although a fair amount of that is due to the cloudiness.


Here I am sanitizing the bottles. This didn't take too long as I could do two bottles at a time. (Other arm not seen b/c it is taking the picture.)

At this point I boiled a cup of corn sugar with 2 cups of water. This will be added to the bottling bucket so that the yeast have something to munch on in the bottles and produce carbonation. Sorry, no picture, just imagine boiling water and you've got it.


Now I'm siphoning the beer from the carboy to the bottling bucket to which I've already added the cooled corn sugar solution. Unfortunately, the tubing I have has an inner diameter which isn't quite small enough to create a good seal so my auto-siphon wouldn't even work. However, I wrapped the end of the auto-siphon with some tape to get a more snug fit, which allowed the auto-siphon to work, but it leaked some air into the beer, which is not entirely desirable.


Here I'm filling the bottles, one by one. The bottle filler is spring-loaded so you press it on the bottom of the bottle and the beer starts flowing. If you fill it to the top it leaves the right amount of air space in the top of the bottom once you remove the filler.

I had the same problem with the tubing on the bottle filler as the auto-siphon, which again I fixed through the application of tape to the filler. I think before I bottle my next batch I will have to go out and get some small hose clamps; the tape works, but it isn't an ideal solution.


Here I'm capping the bottles. I decided to throw the bottle caps in the bottom of the 4 gallon pot of sanitizer, which meant that every time I fished one out, I would get sanitizer inside my glove. Next time I will put my caps in a somewhat shallower vessel.


Yep, that's 46 bottles in all. It's quite satisfying to have them all capped up. Now to wait a week and hope I didn't just make a bunch of bottle bombs.

Like I said before, I'm a little concerned about the oxidization that occurred because of my tubing issues. I think I should be ok as beer is pretty resilient, but only time will tell.

Bottling was not very hard work, just rather tedious. It'll definitely go faster next time now that I know what to do (and what not to do). Cleaning up after is probably the hardest part, what with all the sediment and yeasty bits left in the carboy and the bottling bucket.

That's all for now. I'll post again in about a week when I crack one of the bottles open.

Friday, January 25, 2008

Badger Dark Ale - First Taste

So I've been somewhat concerned that I might have a stuck fermentation. As of now, the bubbling frequency is around 5 minutes. But after a little research on the type of yeast this recipe uses (Windsor Dry Ale Yeast) I found that it is a pretty fast fermentor. Since fermentation has pretty much all but stopped I decided to go ahead and take a SG (specific gravity) reading, which ended up being 1.016. Apparently the Windsor strain has medium-low attenuation (attenuation is basically what percentage of sugars the yeast will ferment), so this reading seems about right (remember that my OG was 1.040).

Of course, you are never supposed to return the sampled beer to the fermentor, lest you sully it with other microorganisms, so you give it a taste. I was actually pleasantly surprised with how it tasted. It's a little sweet (again, becuase the yeast have left about 30% of the sugars), but a little bitter when you move it to the back of your tongue. The alcohol content is pretty low (more on that later) and it's not very hoppy at all (more on that later as well). It was not quite as complex as I was expecting it to be and of course it's completely flat, but I think by the time it's done aging in the bottle (about a week), it should be pretty good.

The beer was also rather cloudy, which is because the Windsor yeast has medium-low flocculation. Again, I hope that will improve somewhat before and after I bottle. At this point I think I will bottle on Sunday, hopefully things will improve a little by then.

Right now the alcohol by volume is at 3.15% and I don't really expect it to increase much. Also, since I used 1 oz. of 2.4% alpha acid Tettnang hops and 0.5 oz. of 4.0% alpha acid U.K. Fuggles hops, the beer will have a bitterness of 4.4 HBU (homebrew bitterness units) which is about 18 IBU (international bitterness units). For reference, a typical American "lite" beer is about 10 IBU and an IPA is about 50 IBU.

Sorry about no pictures, I drank the beer before I thought of taking a picture of it. I'll post again on Sunday at the latest, even if I don't end up bottling. I might try brewing my next beer on Sunday as well, but I'm thinking I might want to be somehwat more selective with my yeast choice, so we'll see.

Wednesday, January 23, 2008

Badger Dark Ale - Decreased Activity

This morning I awoke to find that the activity in the carboy had decreased and the foam had subsided so I was able to put on the fermentation lock as seen below. Air is bubbling out of the fermentation lock every 30 seconds or so. At this rate I believe I should be able to bottle sometime early next week.

Tuesday, January 22, 2008

Badger Dark Ale - Initial Activity

I woke up at 9 this morning to find this:


The image doesn't do it justice, but you can see little bubbles moving up the sides of the carboy. There is also a small amount of foam and muck in the bottom of the blowoff container (a.k.a. the plastic gallon jug). The carboy's temperature has gotten up to 66F (ambient temperature is around 68F). The foaming should subside sometime in the next two days and then I can put the fermentation lock on. I'll post another update then.

Monday, January 21, 2008

Badger Dark Ale - Brewing

So today I finally took the plunge and brewed my Badger Dark Ale kit. Here's a somewhat brief account of how it went down. There aren't a whole lot of pictures because it's hard to take pictures when you're in the middle of pouring the wort into the fermentor, for example.


The first step was to sanitize everything, so I filled my bottling bucket with 5 gallons of water and some One Step sanitizer. The nice thing about one step is that it isn't terribly harmful and it doesn't require rinsing. I also found out that my auto-siphon doesn't work when the water level is too low, so I had to siphon water from the sink to my bucket the old fashioned way.


Next was filling the stainless steel pot with water and adding the steeping grains...


...then waiting for it to heat up to 170F. Luckily my digital thermometer has a temperature alarm so I don't have to babysit it.


Of course, you have to drink beer while you're making beer. Still waiting on that pot to reach 170F. (I wasn't drinking two beers, I had my friend Greg come over and hang/help out.)


The pot has finally reached 170F, but now I have to try to hold it there for 5 minutes. On my electric stove top. Yeah. Needless to say there was a lot of knob turning and lifting of the pot.


Meanwhile, the bag of dark malt extract is being heated up so that it will pour easier.


The extract has been added and now we boil.


Boiling!

So once the pot is boiling the hops are added (1 oz. of Tettnang). There is no picture of this because as soon as the hops were added the pot really started to foam up and more lifting and knob-turning ensued until it was under control.

When the wort was finished boiling (there was 0.5 oz. of UK Fuggles hops added right at the end for aroma) it was placed into the sink which was full of cold water to which ice was added. I was surprised at how fast the ice (two 2 gallon bags full of ice cubes) was able to cool the wort. It got down to about 80F in roughly 5 minutes.

While waiting for the wort to cool, we sanitized the carboy and then poured 3.75 gallons of cold drinking water into it. Then the wort was poured into it. I got this nice big funnel at Friar Tuck and it has this nice fine-meshed filter at the bottom. I think it's too fine-meshed however, because it took awhile to pour all the wort into the carboy. I had to get a spoon to sort of stir the wort around in the funnel to get it to drain faster. I think next time I'll just use my somewhat larger sieve.

Then the yeast was hydrated, but that takes 15 minutes, so a hydrometer reading was taken while waiting for that. It read 1.04 and the carboy temperature was about 63F.


Finally, the yeast was pitched, the stopper put on, the carboy moved to my closet, and the blowoff hose attached. Now to play the waiting game.


The whole process is actually rather messy. Also, malt extract syrup is quite sticky, but not too difficult to clean up with some hot soapy water.

The whole process took about 3.5 hours, from the addition of the steeping grains to the attachment of the blowoff hose. There are a few things I will do differently next time, but overall I think I was well prepared.

I'll be sure to post a picture or two when (hopefully not if!) there starts to be some activity, so stay tuned.

Saturday, January 19, 2008

Equipment

Here's my equipment. I apologize for the lack of focus in some of these pictures; for some reason I was unable to keep my arms still.


A. 6.5 gal. Ale Pail/Bottling Bucket and lid. This can be used as the primary fermentor in a two stage fermentation and doubles as a bottling bucket (note the spigot).
B. 5 gal. glass carboy. This is my main fermentor, complete with temperature strip.


A. Hydrometer and tube.
B. Fermentation lock.
C. Rubber stopper for carboy (fermentation lock fits in here).
D. Sanitizer. I think it's like OxyClean or something because it says it uses oxygen to do its sanitizing and doesn't require rinsing, which is nice.
E. Pipette. I have a few more of these; they're mainly for taking samples for hydrometer readings.


A. Blowoff hose. This attaches to the rubber stopper and will feed into separate container for the first couple of days of fermentation when the carboy is "foaming over".
B. Funnel. Aids in pouring liquids into the carboy.
C. Siphon hose.
D. Funnel filter. This fits nicely in the bottom of the funnel and is pretty finely meshed so you can sparge your hops and filter out other solids.
E. Auto-siphon. A couple pumps is all it takes to get a nice siphon going.


A. 21" stainless steel "charismatic" spoon. I'm not sure why they call them "charismatic". Google isn't much help on the topic. I guess it has something to do with the length of the spoon.
B. 4 gal. stainless steel pot. It's pretty high quality, it has a thick base with a layer of copper to prevent scorching. Very sexy.
C. Digital thermometer. Reads from 0C to 200C. Will mostly be used to monitor wort temperature.


A. The aforementioned book, instructions specific to the ingredient kit, and general instructions from the aforementioned shop.
B. Steeping grains and "sock". These will sit in the wort pot as it heats up and will be taken out before the malt extract is added.
C. Tettnang hops, for flavor.
D. UK Fuggles hops, for bitterness and aroma.
E. Corn Sugar, which will be dissolved and added just before bottling to promote carbonation in-bottle.
F. Dark malt extract.
G. Dry ale yeast.


A. Bottle caps. Lots of them.
B. Bottle capper. Allison informs me that these are a lot of fun. I sure hope so.
C. Bottle filler. It's spring-loaded, so you just push it against the bottom of the bottle to get things flowing.
D. Bottle brush.
E. Carboy brush.


And finally, 48 12oz. bottles. I have some extras hanging around in case I have more beer than can fit in these.

That's it for now. I still intend on brewing on Monday, so a post describing that experience shall follow.

Monday, January 14, 2008

An Introduction

This blog's purpose is to chronicle my foray into the world of homebrewing. I've been kicking around the idea for awhile and after writing a paper on yeast last semester I decided to take the plunge.

I received The Complete Joy of Homebrewing for Christmas and after reading the introductory chapters a few times I was ready to assemble my equipment from the Wine and Hop Shop in Madison, WI. I bought just about everything there, except for a stainless steel pot, bottles, and some odds and ends. I plan on completing my assemblage of equipment this week and hopefully brewing on Monday. Another post documenting the process, complete with pictures will follow later.