Sunday, January 31, 2010

Oatmeal Coffee Stout - Bottling

Today was bottling day for the Oatmeal Coffee Stout.

100_3915
The only thing that's missing is bacon, really.

After sanitizing everything, and adding the priming sugar to the bottling bucket, I brewed 16 cups of coffee and poured it, still hot, directly into the bottling bucket. My french press is only 8 cups so I had to do two batches. I used a super dark roast and made the coffee as strong as I could to ensure it comes through in the beer.

100_3922
Why yes, those are four bombers, bottled specifically for BBQs and bad days.

I waited for the coffee to cool and then siphoned the beer into the bottling bucket. Then it was bottling time.

100_3921
Forget paper labels, I'm lazy.

As you can see, bottling was successful. Although, I had some issues with my bottling wand leaking a bit; I probably lost half a bottle or more because of it. It might be time to get a new one. Or move to kegging.

My final yield was 38 12oz. and 4 22oz. bottles, for a total of 4.25 gallons. The ABV is roughly 5.5%.

100_3923
My storage solution, partly thanks to the Container Store.

I found out that the freezer is a quarter inch too small to hold my cardboard boxes, which would be ideal. So I went to the Container Store and managed to find some plastic bins that are pretty much as close as you can get. To be honest, I'm still not completely happy with it as I know I'm not maximizing my packing potential, but it will work for now.

Now I must wait at least 3 weeks before this beer will be drinkable. As usual, there was a half-full bottle, so I'll crack that open in two weeks (or one, if I am impatient) and see how it is.

My next beer will definitely be an IPA, but I'm not sure when I will brew it. I was a little too prolific the last time I brewed so I'm thinking this time I will limit myself to one brew day a month. We shall see.

Next: OCS, Aged 2 Weeks or Brew Day?

Friday, January 29, 2010

Oatmeal (Coffee) Stout - First Taste

Ok, it's been almost two weeks since brew day, so I took a sample and things are looking good.

100_3912
The sample was more than this, I just drank most of it before I remembered to take a picture.

The specific gravity is currently 1.016, which is a little higher than the 1.012 that the recipe says. However, those keeping score at home will recall that my OG was 1.060, which was 7 points higher than the recipe's OG. So it looks like my ABV will be correct at about 5.7%, but it will be a little sweeter and have a bit more body than it otherwise might have had.

As for taste, it's slightly sweet, but definitely bitter enough to call a stout. It's deeper than I expected at this point, which means it should age very nicely. It has a slightly fruity aroma, but that doesn't come out in the flavor of the beer at all.

Since everything looks good I plan on bottling this weekend. I bought some local dark roast coffee today that I will brew extra strong and add to the bottling bucket. I think two quarts of coffee is my target, so my french press will be mighty busy.

Next: Bottling

Monday, January 18, 2010

Oatmeal (Coffee) Stout - Initial Activity

I'm happy to report that there is now some vigorous fermentation taking place in my home. I speak not of the leftovers in my fridge, but of the beer-to-be in my incubator.

(Careful readers will note that I have referred to this contraption as "the freezer", "the beer cooler", and now "the incubator". I have decided to call it "the incubator" from here on out as I feel that is the best description for it.)

100_3909
An inch of krausen and the steady mumble of bubbles indicates that the yeast are doing their thing with gusto.

The fermentation for this beer took longer than I am used to. Usually within 24 hours the fermenter is going crazy. This time it ramped up much more slowly. After about 18 hours it was bubbling every 30 seconds, after 36 hours it was bubbling every 5 seconds, and finally, now, after about 48 hours, it is bubbling constantly. There is nothing wrong with this; it's just different. My guess is that I probably pitched the yeast too cool and maybe did not aerate the wort enough.

Anyway, so far so good. Unless disaster strikes, there won't be much to report for a couple weeks when the fermentation is complete.

Next: First taste?

Saturday, January 16, 2010

Oatmeal (Coffee) Stout - Brew Day

So today was brew day for my oatmeal (coffee) stout. I put "coffee" in parentheses because there isn't any coffee in it yet. That is, I plan on putting coffee in it, but not until the bottling stage. More on that later.

This was my first time doing a mini-mash and I think it went quite well. I'll let the pictures do the talking.


In the large pot I have 2.5 gallons coming up to 160F. The smaller pot has 0.5 gallons which will eventually be brought to 170F and used to sparge.


While waiting for the water to heat up, I put the grains in the nylon mesh bag. The bowl is to prevent grain dust from going everywhere. After ruining one temperature probe by submerging it, you can see I got smart and am using a clothespin to this probe in place.


Here goes nothing.

100_3885
Now the grains will soak at about 155F for 45 minutes.

100_3887
Here I have the temperature right on the nose. The enzymes responsible for converting the starches in the grains to sugars work best around this temperature. If you go much higher than 160F it's pretty much game over.

100_3890
Here's what it looks like after the grains have been removed and sparged. It looks fantastic and I can't wait to drink it.

There aren't any photos of the sparging process because I needed both hands to get the strainer under the grain bag. Then I had to hold the strainer and the grain bag over the pot with one hand while I rinsed the grains with 170F water with the other hand. This part of my process definitely needs some refinement, but I managed for now.

At this point I brought the wort to a boil, turned off the heat, and added the liquid malt extract. After dissolving all the extract, I brought it back up to a boil.

100_3899
This photo was taken just a few seconds after I added the hops and narrowly avoided a boil-over with my lightning-quick reflexes. The wort will now boil for one hour.

After the hour long boil, I cooled the wort in an ice bath. Normally, I would just let it sit, but this time I carefully circulated the wort with my sanitized brew spoon. This had the effect of cooling my wort to 80F in about 10 minutes and it helped to gather and settle out the hot break and hops. Thus, when I went to pour the wort into the fermenter, I did not have to worry about getting any break or hops in it until the last inch of liquid. At that point I grabbed my stainless fine mesh strainer, which let me separate the breaks and hops from the last bit of wort.

100_3904
Before pitching the yeast, I took a specific gravity reading and came up with 1.060. The recipe says it should be about 1.053. I attribute the difference to the fact that the volume of wort is less than 4.5 gallons. The final gravity is supposed to be 1.012, which will give me an ABV of about 6%.

100_3907
After pitching the yeast, I placed the fermenter in my freezer turned beer cooler and attached the blowoff hose. Now to wait for the yeast to get cranking. The probe of my temperature control is taped to the side of the carboy to get a better measurement of the beer's temperature.

Next: Initial activity?

Friday, January 15, 2010

Back in Black (Patent Malt)

After a brief year and a half long hiatus from brewing, I have decided to get back on the horse (or did I fall off the wagon?).

Why a year and a half? Well, I lived in Seattle for a year and I found it hard to justify brewing in a city with such a high brewery per capita. Why should I expend all that effort when I can walk a few blocks and get something much, much better? I moved to Austin six months ago and have just been getting settled in since then, I guess.

Although Austin exceeded my beer expectations, I realized that I miss that creative process and the gratification you get from producing something all by yourself. It's the same reason people make their own bread, or yogurt, or stock, or ice cream--it's just more fun, ok?

The first obstacle (in my mind, anyway) to homebrewing in Austin was the temperature. I moved down here during an extremely hot summer. It broke records. I instantly started sweating profusely every time I went outside. There was no way in hell I was going to be able to brew when the ambient temperature in my house is 80F. Forget it. Of course, I could brew only when it was cool enough, but that's only 3 or 4 months out of the year, which is no fun.

So after amassing some funds (largely thanks to Christmas and working some overtime), I purchased a 7 cubic feet freezer. Yes, I realize the irony of purchasing a freezer in January. Yes, it probably isn't necessary right now, but when it warms up (probably in just a few weeks) I'll be glad I got it.

100_3859
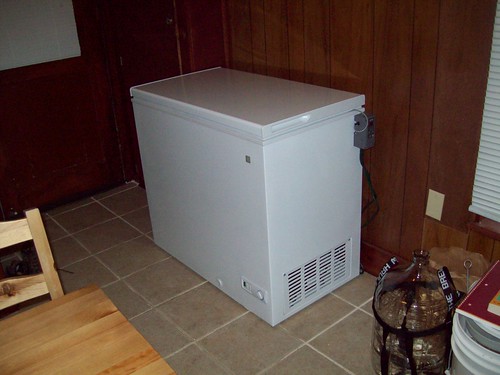
7 cubic feet of awesome. You can see the temperature controller mounted on the side.

So of course, in order to keep the freezer from being a true freezer, I need a temperature controller, which I found at my local brew shop, Austin Homebrew Supply (AHS).

100_3860
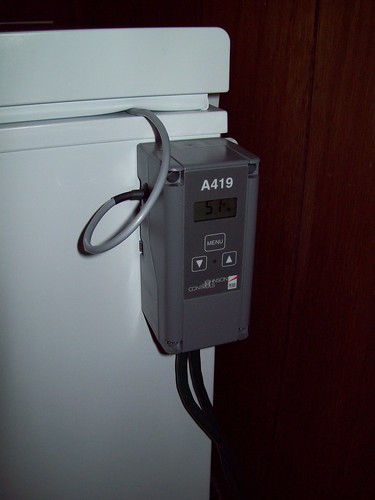
Makes the engineer in me go "mmm...".

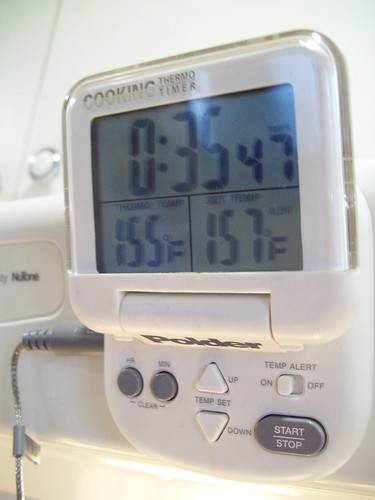
I have it mounted with one of those sticky strips that is used for those plastic 3M hooks you can stick to your wall. Yes, ingenious, I know. It is currently set to keep the freezer cooler in the 62F to 66F range. I can easily set it for lagering temperatures as well, if I ever have a mind to do such a thing.

100_3861
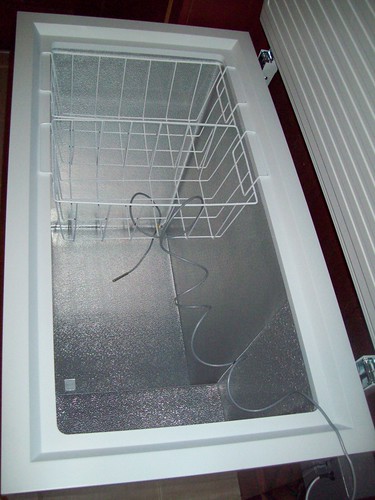
The interior. I am using the baskets to keep the temperature probe near the center of volume.

When shopping around for a freezer I knew I wanted something that I could put both my carboy and bottles in at the same time. Like I mentioned before, ambient temperature in the summer time is too warm to keep beer. Thus, I'd like to be able to store beer at gentler temperature and still have room to brew.

I found a 5 cubic feet model that was close to what I wanted, but after crunching the numbers, it just wouldn't be big enough. So I sprung for the 7 cubic feet model, which actually was not that much more expensive. I ordered it on Monday and it got delivered today.

And since the freezer got here today that means that
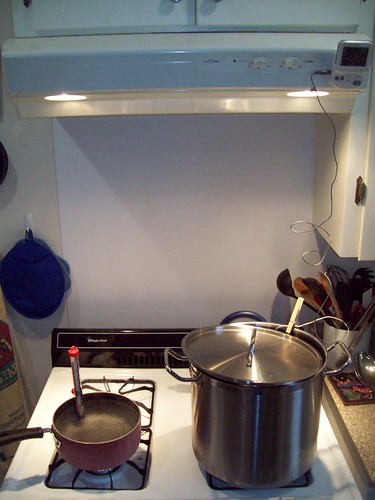
 tomorrow is brew day!

Since my previous oatmeal coffee stout was a hit, I decided that my first beer after my hiatus would be just that.

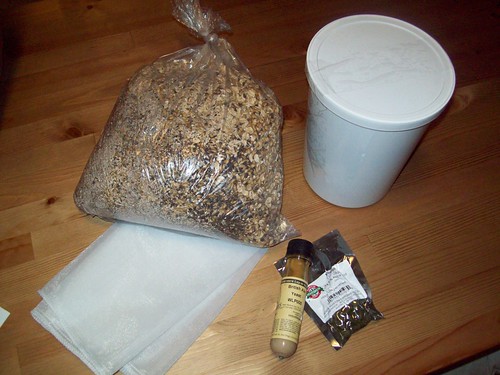
I was planning on using the same recipe, but after browsing AHS' website and seeing that their oatmeal stout kit got rave reviews, I figured I would just get that kit and amend it with coffee at bottling time. (After I got the kit and saw what was in it, I realized it isn't all that different from what I originally did anyway.)

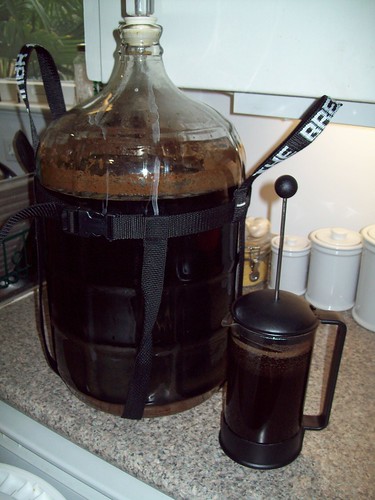
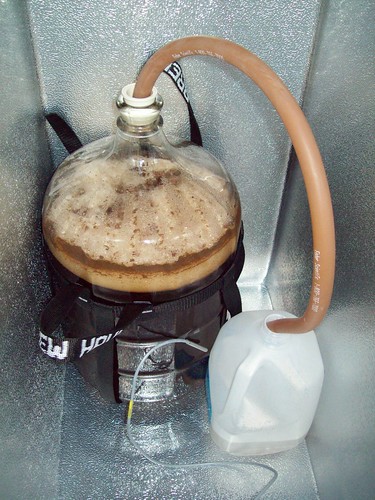
So I drove literally 5 minutes to AHS, picked up the kit, the temperature control, and a pretty nifty carboy carrying harness.

100_3866
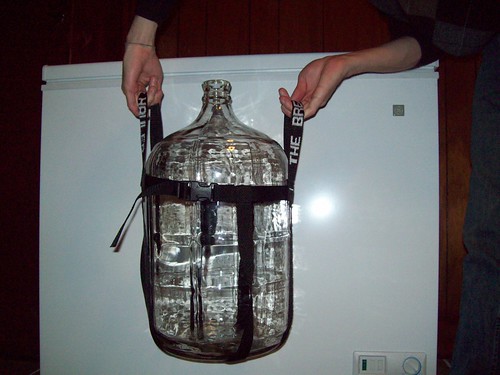
No more freaking out because the carboy is really heavy and my hands are slipping on the glass!


AHS is completely awesome. They have a very wide selection of everything and they have a ridiculous number of recipes on hand, including an astounding amount for replicating commercial beers. (They have a recipe for Sand Creek's Oscar's Chocolate Oatmeal Stout! Glee!) The best part is that you tell them which recipe you want, whether you want extract, mini-mash, or all-grain, and they go in the back and put it together for you in a matter of minutes. So you don't need to worry about how long a certain kit has been on the shelf; they always make them to order.

100_3862
Let's do eeeet.


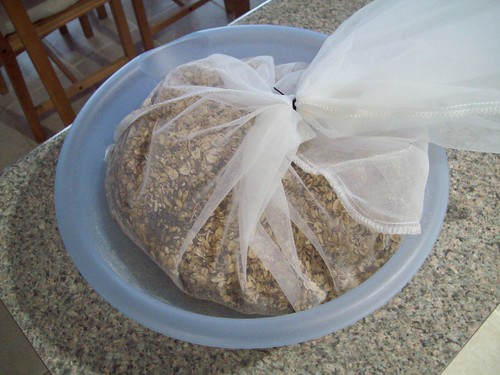
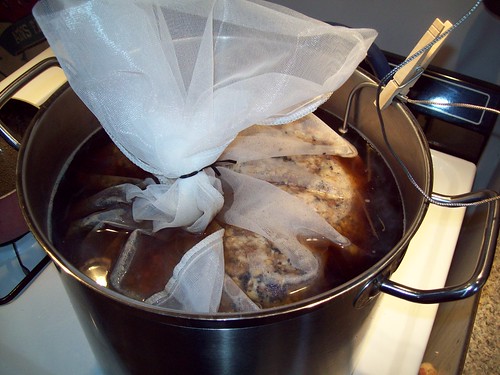
Unfortunately, I forgot to tell them to keep the oatmeal separate, so it looks like I won't get to toast it this time around. I guess I could try to separate it out... hmm... no. I'm sure it will taste just dandy anyway.

Next: Brew day!

Monday, May 5, 2008

Light Ale - Brewing and Bottling

I brewed the Light Ale kit from www.morebeer.com last weekend. Brewing went just fine, it was something like 6 lbs. of ultralight liquid malt extract, and about a half a pound of Crystal 40L as adjunct grains. Only 0.5 oz. of Glacier (6% AA) hops were used for the boil and 1 oz. of Glacier (4.6% AA) were used for aroma so it shouldn't be very hoppy. (Indeed, it isn't, as I'll mention in the bottling part of this post.) I used Nottingham Ale dry yeast as I needed this to brew in about a week.

I then bottled it this weekend, however, I had a bit of a devilish idea as you can see below.


That's right, there's a serrano pepper in that beer. There's 13 more just like it. It's going to be quite the beer as the peppers are pretty darn hot. I steamed the peppers very briefly to try to help sanitize them and just that little time in the steam they already began to exude an intense aroma of capsaicin. I was wearing gloves the whole time while handling them (I'm not afraid of peppers, it's just part of my sanitation procedure) and figured I didn't get any residue on my hands. Well, I must have touched some residue and scratched my face at some point b/c the whole left of my face is burning a little right now.

Anyhoo, peppers aside, the beer tastes just fine (as well as a beer fresh out of the fermenter can taste) and weighs in at about 4.5% ABV. I'm really looking forward to cracking open one of those pepper beers. How apropo that I bottled this on cinco de mayo. I should call it Ale Caramba, or maybe Cinco de Mayi-yi-yi-o, I don't know.

Scotch Ale - Bottling and Tasting

It seems that I was not vigilant enough with my cooling and at some point the beer got warm enough to start producing fruity esters. It smells rather like banana, however, this is not reflected in the taste. I bottled it last weekend and so cracked open a bottle yesterday just to see how it was doing. Let's just say it needs to age for several more weeks. I don't think I'm going to try it again for another 3 weeks. Right now it's not looking so hot, but aging can do wonders for a beer, so we'll see.